Optimization
Getting Started
Introduction
Parameter optimization is the process of finding the optimal algorithm parameters to maximize or minimize an objective function. For instance, you can optimize your indicator parameters to maximize the Sharpe ratio that your algorithm achieves over a backtest. Optimization can help you adjust your strategy to achieve better backtesting performance, but be wary of overfitting. If you select parameter values that model the past too closely, your algorithm may not be robust enough to perform well using out-of-sample data.
Launch Optimization Jobs
Local Platform provides multiple deployment targets to enable you to run backtests on-premise and in QuantConnect Cloud.
You need the following to optimize parameters:
- At least one algorithm parameter in your project.
- The GetParameter method in your project.
- A successful backtest of the project.
Follow these steps to optimize parameters:
- Open the project that contains the parameters you want to optimize.
- In the top-right corner of the IDE, click the
 /
/  Optimize icon.
 - On the Optimization page, in the Parameter & Constraints section, enter the name of the parameter to optimize.
- Enter the minimum and maximum parameter values.
- Click the gear icon next to the parameter and then enter a step size.
- If you want to add another parameter to optimize, click .
- If you want to add optimization constraints, follow these steps:
- Click .
- Click the target field and then select a target from the drop-down menu.
- Click the operation field and then an operation from the drop-down menu.
- Enter a constraint value.
- If you are deploying to QuantConnect Cloud, in the Estimated Number and Cost of Backtests section, click an optimization node and then select a maximum number of nodes to use.
- In the Strategy & Target section, click the Choose Optimization Strategy field and then select a strategy from the drop-down menu.
- Click the Select Target field and then select a target from the drop-down menu.
- Click Maximize or Minimize to maximize or minimize the optimization target, respectively.
- Click .
The parameter name must match a parameter name in the Project panel.
You can optimize a maximum of three parameters. To optimize more parameters, run local optimizations with the CLI.
The target (also known as objective) is the performance metric the optimizer uses to compare the backtest performance of different parameter values.
The optimization results page displays. If you deploy a local optimization job, you can close Local Platform and Docker Desktop as the optimization job runs without interfering with the backtests. Just don't quit Docker Desktop. If you deploy the optimization job to QuantConnect Cloud, you can close Local Platform and Docker Desktop without interrupting with the backtests because the nodes are processing on our servers.
To abort a running optimization job, in the Status panel, click and then click .
View Individual Backtest Results
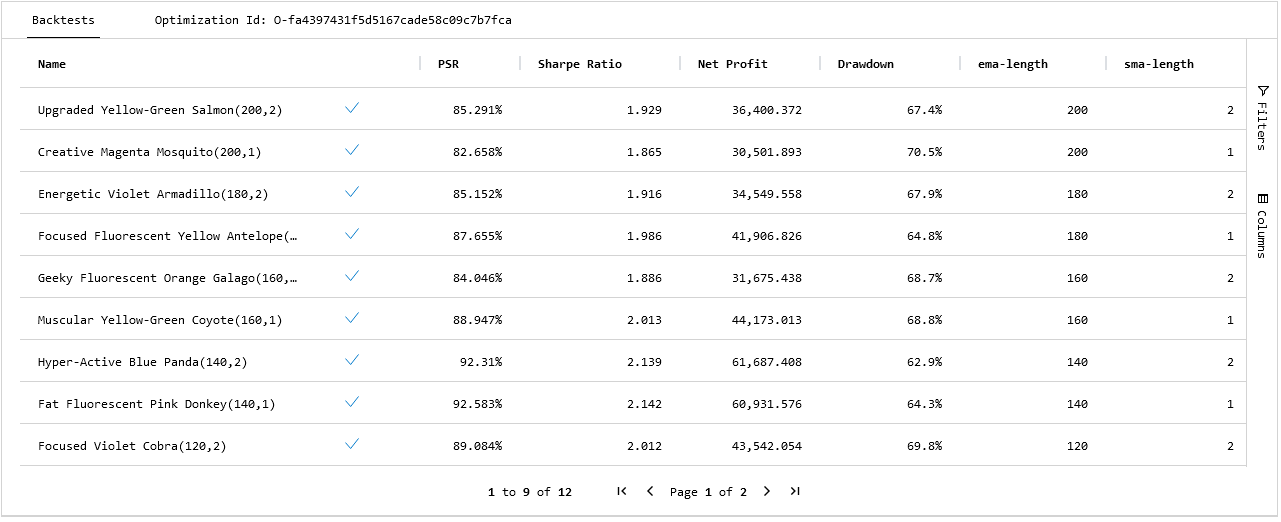
The optimization results page displays a Backtests table that includes all of the backtests that ran during the optimization job. The table lists the parameter values of the backtests in the optimization job and their resulting values for the objectives.

Open the Backtest Results Page
To open the backtest result page of one of the backtests in the optimization job, click a backtest in the table.
Download the Table
To download the table, right-click one of the rows, and then click .
Filter the Table
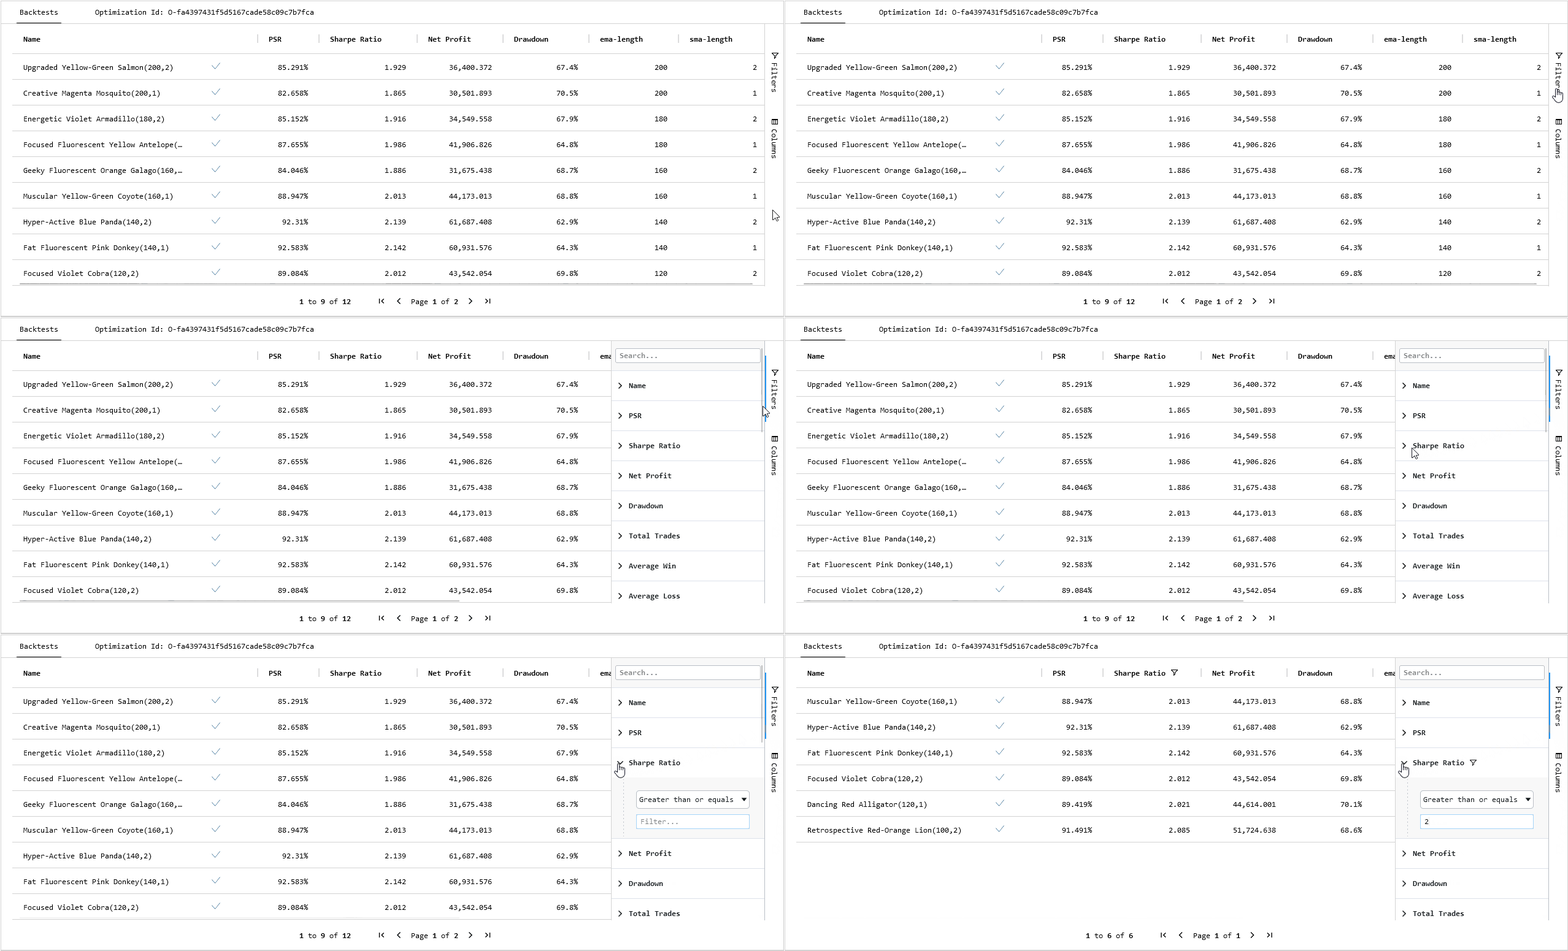
Follow these steps to apply filters to the Backtests table:
- On the right edge of the Backtests table, click .
- Click the name of the column to which you want the filter to be applied.
- If the column you selected is numerical, click the operation field and then select one of the operations from the drop-down menu.
- Fill the fields below the operation you selected.

Toggle Table Columns
Follow these steps to hide and show columns in the Backtests table:
- On the right edge of the Backtests table, click .
- Select the columns you want to include in the Backtests table and deselect the columns you want to exclude.
Sort the Table Columns
In the Backtests table, click one of the column names to sort the table by that column.
View All Optimizations
Follow these steps to view all of the optimization results of a project:
- Open the project that contains the optimization results you want to view.
- At the top of the IDE, click the
 /
/  Results icon.
 - (Optional) In the top-right corner, select the Show field and then select one of the options from the drop-down menu to filter the table by backtest or optimization results.
- (Optional) In the bottom-right corner, click the Hide Error check box to remove backtest and optimization results from the table that had a runtime error.
- (Optional) Use the pagination tools at the bottom to change the page.
- (Optional) Click a column name to sort the table by that column.
- Click a row in the table to open the results page of that backtest or optimization.
A table containing all of the backtest and optimization results for the project is displayed. If there is a play icon to the left of the name, it's a backtest result. If there is a fast-forward icon next to the name, it's an optimization results.

Rename Optimizations
We give an arbitrary name (for example, "Smooth Apricot Chicken") to your optimization result files, but you can follow these steps to rename them:
- Hover over the optimization you want to rename and then click the pencil icon that appears.
- Enter the new name and then press Enter.

Delete Optimizations
Hover over the optimization you want to delete and then click the trash can icon that appears to delete the optimization result.

Result Files
To view the results files of a local optimization job, open the <organizationWorkspace> / <projectName> / optimizations / <optimizationName> directory. The following table describes the initial contents of the optimization result directories:
| File/Directory | Description |
|---|---|
| code / | A directory containing a copy of the files that were in the project when you ran the optimization. |
|
<backtestId> /
Ex: 1c5b8eff-89c0-432f-98c7-60b73265b188 / | A directory containing the backtest result files for one of the backtest in the optimization job. There is separate directory for each backtest in the optimization job. |
| log.txt | A file containing the syslog. |
| config | A file containing some configuration settings, including the optimization Id, Docker container name, and optimization name. |
| optimizer-config.json | A file containing some configuration settings, including the parameters, strategy, and constrains. |
|
optimization-result-<optimizationId>.json
Ex: optimization-result-2455523408.json | A file containing additional results, including runtime statistics. |
Algorithm Lab Optimizations
For information about cloud optimizations through the Algorithm Lab, see Getting Started.
Get Optimization Id
To get the optimization Id, open the optimization result page and then scroll down to the table that shows the individual backtest results. The optimization Id is at the top of the table. An example local optimization Id is 2726379566. An example cloud optimization Id is O-696d861d6dbbed45a8442659bd24e59f.

